New Beginnings
Ever wondered how AI can help you build a complete website from scratch? I recently built this very website you’re reading with the help of GitHub Copilot, and the experience was fascinating to say the least. Let me walk you through the entire process, from initial generation to the final touches.
Note: This blog assumes basic knowledge of Github and Github Pages. Beyond that, it is more or less vibe-coding and continuous refinement via trial-and-error. Mind you, I am no webdev expert myself :)
Walkthrough
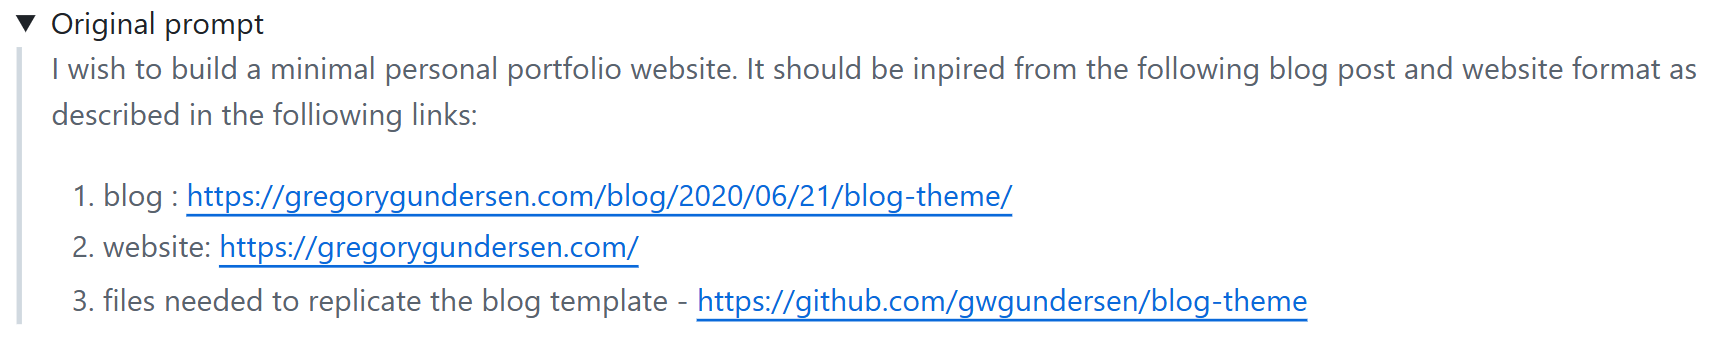
I wanted to create a minimal, professional personal website that would serve as both a portfolio and a blog. The requirements were simple:
- Clean, minimal design inspired by Gregory Gundersen’s website
- Jekyll-based for GitHub Pages hosting
- Responsive design that works on all devices
- Easy to maintain and extend
Answering the Why’s
Why:
- Github Pages? Free static site hosting service provided by GitHub, allowing users to host websites directly from a GitHub repository.
- Jekyll-based? Static site building tool; no CSS and HTML hassle for me. Write plain markdown files and Jekyll handles rest for you.
- Minimal and Responsive-design? Easy to maintain and extend
Using GitHub Copilot for Initial Scaffolding
The magic began when I stumbled upon GitHub Copilot’s ability to generate entire project structures and repositories based on a simple prompt at the time of creating a new repo.
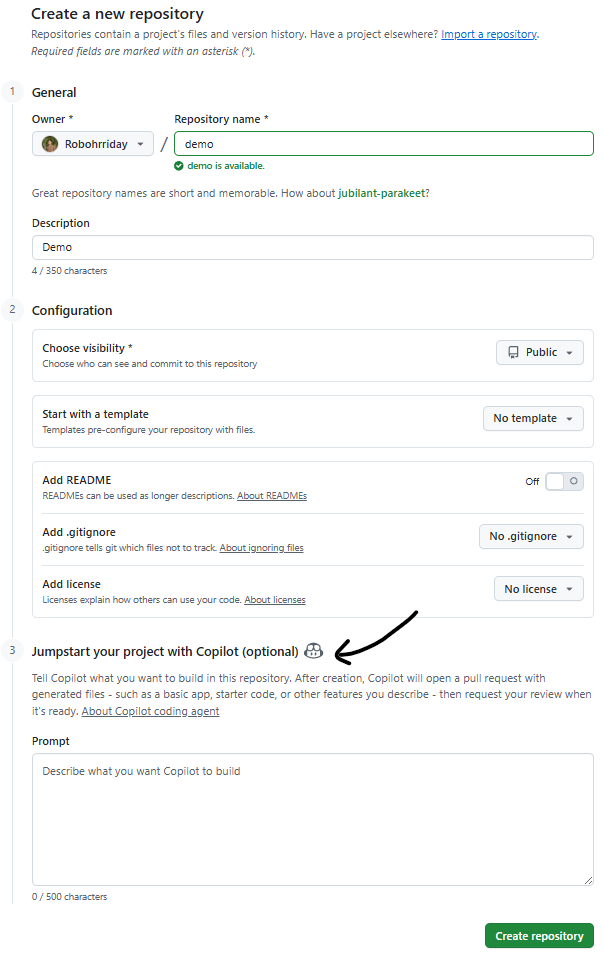
Note: It is necessary to the name the repository which will be hosting the GitHub pages as <username>.github.io. For instance, my GitHub username is Robohrriday, hence, the repo name hosting my website is also Robohrriday.github.io.
What Copilot Generated:
- Complete Jekyll project structure
- 498 lines of code across 10 files
- Professional CSS styling
- HTML layouts and templates
- Configuration files and dependencies
The initial commit by copilot-swe-agent[bot] created:
├── _config.yml           # Jekyll configuration
├── _layouts/
│   └── default.html      # Main layout template
├── _includes/
│   └── nav.html         # Navigation component
├── _posts/
│   └── 2025-09-27-building-website-with-ai.md
├── css/
│   └── main.css         # Complete styling (221 lines!)
├── index.html           # Homepage
├── about.html           # About page
├── blog.html            # Blog listing page
├── Gemfile              # Ruby dependencies
└── .gitignore          # Git ignore rules
Some important details of the files listed above:
| File/Directory | Description |
|---|---|
config.yml |
Main configuration file for Jekyll. Controls site-wide settings like title, URL, plugins, and build options (you wouldn’t need to change much here!) |
_layouts/ |
Directory that stores the layout/structure of each page on your website. You can have multiple layouts (for example, one particular layout for home page and another for blogs). All you need to do is use the name of the layout in your markdown files or html content files to format according to the chosen layout. |
_includes/ |
As far as I know, stores reusable HTML snippets. I mainly used it for storing navigation bar details which I use across different pages of my website. |
_posts/ |
I use this directory for new blog posts (markdown files) mainly. |
css/ |
Contains main.css file that handles all the styling and formatting. From my understanding, it is convenient to define/configure a style here, for say how a paragraph should look or should you underline a hyperlink or how to format an image with caption. Once defined, you can use it in your markdown files or html content files as and when needed to avoid code repetition. |
index.html |
This is the main landing page of your website. This is the first page that will pop-up when you visit a website. |
about.html, blog.html |
These are standalone pages of your website that one can navigate to. In my case, I have an about page and blog-listing page. You can have more pages for say projects, CV, etc. |
assets/ |
Not shown in the the initial generation but this is where you store all your media, for intance, images, GIFs, etc. |
Iterative Refinement with AI Assistance
After the initial generation, I spent time refining the website through multiple iterations based on my design preferences, each guided by AI assistance:
- Content Customization: Modified
index.htmland CSS for personal branding - Typography Improvements: Added Montserrat fonts (one of my favorite fonts!)
- Mobile Optimization: Fixed navigation alignment on mobile devices
- Design Polish: Adjusted margins and whitespaces
- Other Integrations: Added
faviconandMathJaxsupport plus tag-based blog filtering
Conclusion
Leveraging AI helped me focus on creativity, strategy, and user experience while it handled corresponding code generation.